
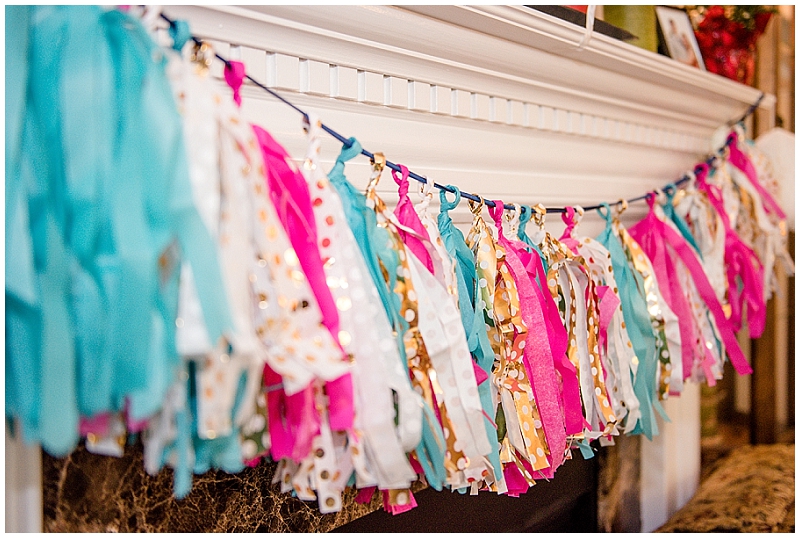
DIY – Tissue Tassel Garland
July 20, 2015
Monday Crafternoons are all about making your DIY project just a little more attainable. I was a serious DIY bride, with a handyman fiancé so we have a ton of projects under our belt. Let us know if there are any projects you want us to add to our series in the comments.
For this week’s crafternoon project we thought we’d start out with an easy one.
The project: Tissue Tassel Garland
The difficulty level: EASY!
Time needed to complete: It totally depends on how long you want the garland. Plan for about an hour for this one.. Best part? It’s remarkably easy and can be done mindlessly in front of the TV. Put on your favorite Netflix show and get goin’.
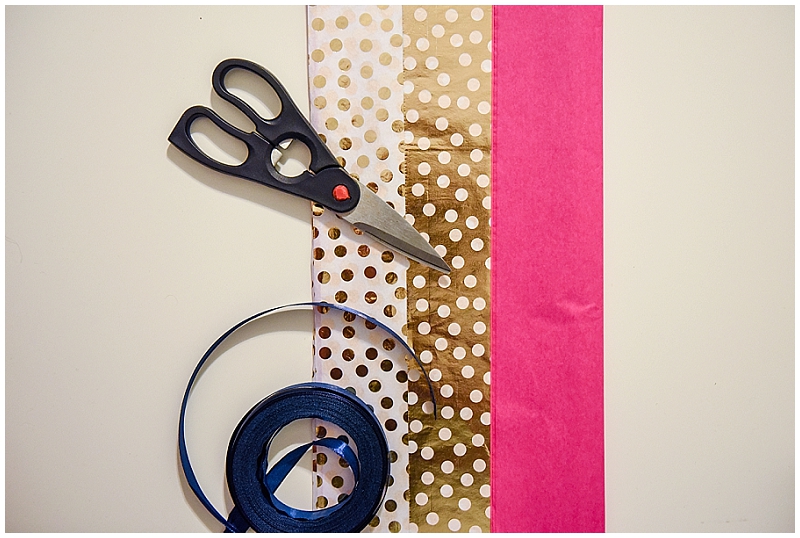
Materials needed: Tissue Paper, Ribbon/String, Scissors
The Total Cost: If you’re like me, I have all theses things on hand. We picked up a pack of 20 tissue sheets in 3 awesome colors for about $3.00. Then I added some blue tissue that we had on hand.. and strung on a ribbon we also had. Depending on the materials you had on hand, this project could range you anywhere between $0 – $10.
Is it worth the DIY?: $3 and an hour of your time.. TOTALLY worth it! And can be easily reused!!!
The Step-by-Step instructions:
I used this awesome blog post from Linen, Lace, & Love.. aka.. a Pinterest find.
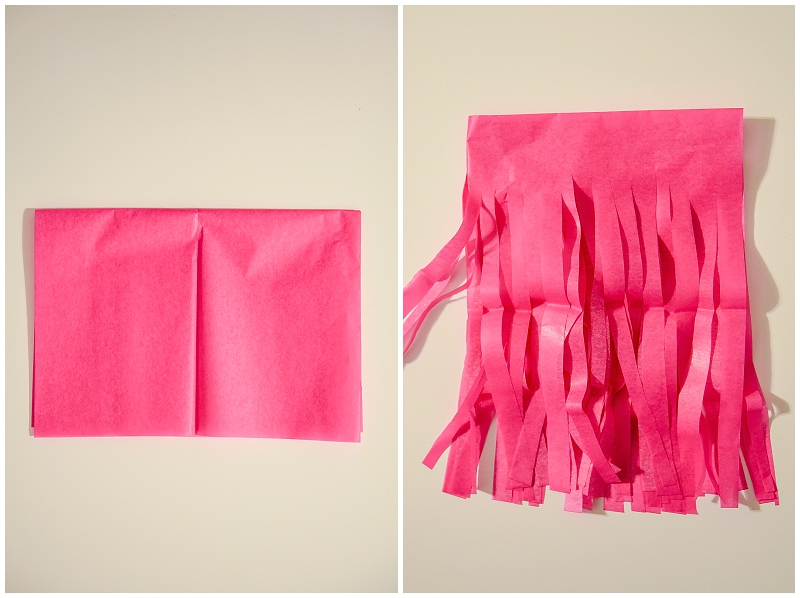
- Pull apart the tissue paper and lay then flat on a table.
- Fold each piece in half (lengthwise), and then in half again (width wise).
- Start cutting your tassles from the bottom to the fold at the top. Stop when you are 1-2 inches from the fold. (After a few cuts, I learned to stack a bunch of these folds on top of each other to cut multiple piece as once. This CRAZY sped up the process.)
- Un-stack the tissue papers and cut each in half to get two tassels from each sheet of tissue. (I started using the full sheet, but it makes a crazy huge tassel. The tutorial I followed actually cut each sheet into 4 tassels. I think this would definitely work.. my tassels were still pretty big, even after I cut them in half.. the only reason I didn’t cut them in fourths is because I didn’t read through the tutorial very well before jumping in to the project.. whoops).
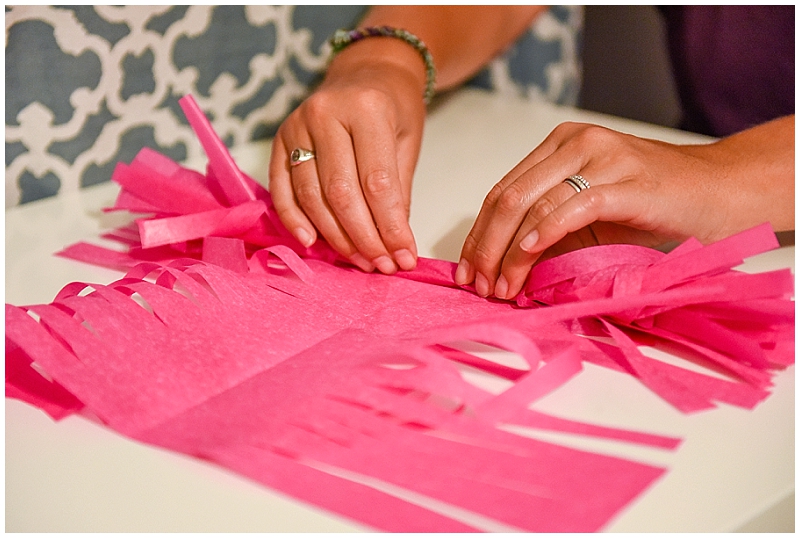
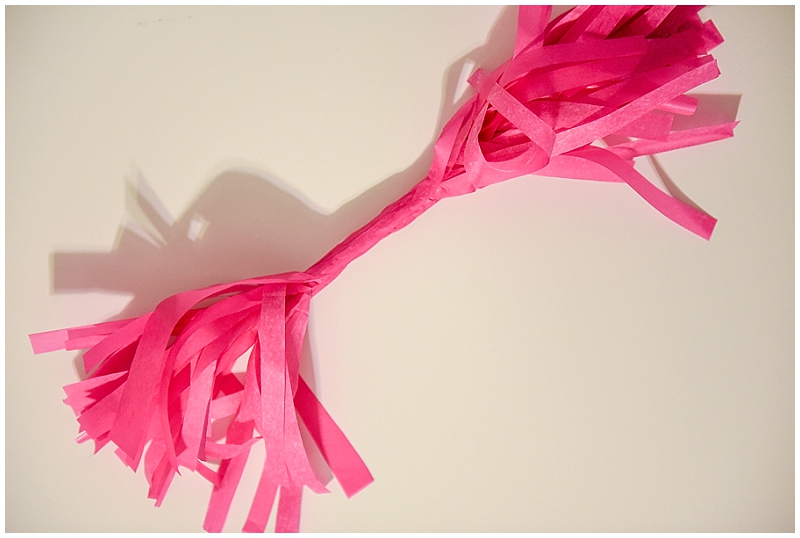
- Then start rollingggggg.. Make sure that while you are rolling you comb out the tassels as you go. If you don’t they will be all tangled and look redonk and you’ll have to tear them loose. (Short cut: fold the tissue to the middle, and then roll.. it’s WAY faster and you can’t tell the difference.)
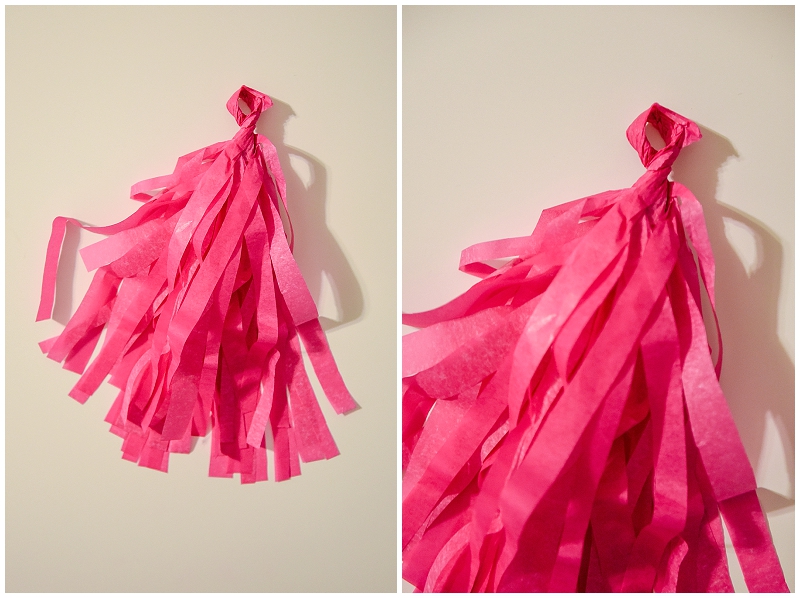
- Once you have the tassel all the way rolled. Twist the rolled part around your finger to create a loop.
- String all the loops through your ribbon and badda bing badda boom.. you’ve got yourself a tassel garland.
Materials:
Fold and cut:
Roll (making sure you comb out the tassels)
Twist the tassel around your finger to create a loop.
String on your ribbon and DONE!

Let us know how it goes!


we're Michael & Laura


")

weddings
hey friends,
a husband and wife photography team based in Richmond, Virginia (though we LOVE to travel!). We hope you enjoy browsing some of our most recent work, reading our tips and tricks for brides, and taking a little peek into our life.
+ More about us
engagements
personal
For Brides
more categories
Lifestyle
For Photographers
Seniors

Let's be friends
photographers in love, for people in love